

Can Chiropractors Help with Coronavirus?
Flatten the curve and take the pressure off the healthcare system. That is a phrase the world is living by. So what can chiropractors do to help? They may not be able to treat the virus, but every person who sees a chiropractor for pain instead of going to their primary care, urgent care, or emergency room is one less person at severe risk.
The Coronavirus has drastically reshaped our healthcare system and economy in a short period of time. Everyone plays a role in slowing the progression of the virus. That includes our office. As you know, the staff at Turning Point Chiropractic has fine-tuned their disinfecting protocols by strictly following CDC guidelines. But there may be more we can do to help.
Over the past five years, more doctors and medical institutions have come out urging patients to seek chiropractic care for musculoskeletal conditions (those dealing with joints, muscles, nerves, tendons, and ligaments) prior to seeing their medical provider. This reduces the burden on the healthcare system which is needed now more than ever.
If you are experiencing spine-related conditions, this includes shoulder and hip pain, our chiropractors are prepared and qualified to treat you not only in person but via tele-health. If an x-ray or MRI is needed, our chiropractors have the ability to order those directly as well. Chiropractors provide an additional portal of entry to the healthcare system and divert people away from emergency rooms, hospitals, and medical offices thus reducing exposure to the virus.
Our doctors are specialists in treating musculoskeletal conditions. This includes pinched nerves, spinal disc problems, muscle strains, and more. If you are experiencing a fever, or flu-like symptoms, please call us ahead of time or click here for more information. There are no chiropractic treatments for the coronavirus or flu.
To schedule an appointment or get more information about the tele-health service, give us a call. We wish you and your loved ones health and safety during this time!
- The Turning Point Team

What's Your Turning Point?
Saratoga Chiropractic office, Turning Point Chiropractic, takes a unique patient-centered approach to help you tackle whatever stands in the way of a healthy and happy lifestyle.
Have you ever dealt with a problem you knew had a simple solution and all you had to do was find the best person to help you? Patients come into Turning Point Chiropractic in Saratoga Springs daily saying they thought they were never going to get better. Others say they felt like they had to settle for their “new normal” of low-grade pain or discomfort or knew they would never be able to (insert activity here) again. Sometimes all you need is a little help.

Turning Point Chiropractic was opened in October 2011 by Dr. Adam Favro with the vision of providing a service to seek out the epicenter of a patients symptoms and take a comprehensive approach to care. No big healthcare system to navigate. No referrals needed. Quality time with a doctor who has extensive experience and knowledge of the human body and how to fix it.
At Turning Point Chiropractic, the doctors have additional training in diagnostics, radiology, biomechanics, rehabilitation, strength training, sports performance, and more. Our chiropractors are not only equipped to accurately diagnose your symptoms but create a treatment plan that helps you get out of pain faster and stay healthy longer.
Our chiropractors believe at the heart of every treatment plan is movement. The more you move, the better you feel. The better you feel the more you move. You didn’t get hurt by just sitting there so why should your treatment be you just sitting there? We don’t know either. When you come to Turning Point Chiropractic your exam will include movement assessments, your treatment will involve movement and your homework will be to move.

For too long the healthcare system has not encourage patients to be active in their own treatment, give feedback on how they feel, and take control of the progress. When patients and doctors are invested in a goal to not only help you feel better but improve the way you live, great things happen. That is what we believe in. That is the Turning Point!
For a free consultation with our doctors and to learn more about the Turning Point Chiropractic treatment system, call us at (518) 584-9500 or click here.

Three Exercises for Better Posture
Assessing good posture or bad posture can be a challenge for even the most skilled provider. At Turning Point Chiropractic we strive to keep people moving in a healthy and safe way. So whether you think you have good or bad posture this article is sure to give you some more information on how to improve it.
If you are like most people, you sit the majority of your day. Whether it’s driving to work, driving for work, sitting at work or relaxing on the couch after a long day of work, sitting has become part of our life. Unfortunately, so has poor posture. Forward head carriage, rounded shoulder, and a slouching position can lead to long term health effects like chronic headaches, degenerative joint changes, and muscle strain. So sit up straight, relax your shoulders, and learn three new exercises to help improve your posture.

Proper posture can be defined as “the state of muscular and skeletal balance that protects the supporting structures of the body against injury”. Two important concepts to take from this definition are balance and protection. Our joints, ligaments, tendons, muscles, and fascia are designed to work a certain way. When we put them in an optimal position this serves as protection to repetitive strain or even traumatic events. Our body is also highly adaptable, but if we continuously stress the tissues in a way that they weren’t intended, we tend to fall into an injury cycle.
This week we are excited to share 3 of our favorite exercises to avoid the aches and pains that come with non-optimal posture.
Thoracic Wall Extension
The first exercise is a great way to stretch out the front of our shoulders and create some extension in our mid-back. To perform, find a wall and stand an arms length away from the wall. Extend the arms so there is very little to no bend in the elbows with the fingers pointing up. Slowly push your hips back and let your upper body fall between the arms, keeping the head in a neutral position. Hold for about 3 seconds and perform 10 repetitions.

2. Chin Tucks
Our second exercise is to put the head in a better position. For every inch forward your ears go past your shoulders it adds an extra 10-12 lbs that the muscles of the upper neck and back need to support. No wonder so many people carry tension in this area! This exercise can be performed sitting or standing. To perform, attempt to pull your chin back toward your spine. Try to avoid looking down when performing this exercise. Imagine your chin is on a table and you are sliding it back. Hold for 2 seconds and perform 10 repetitions. You know you are doing it right if you give yourself a double chin.


3. Modified Brügger
Our last exercise is to strengthen muscles around our shoulder blades. This exercise can also be performed sitting or standing. Start by obtaining a neutral head position by performing a chin tuck. Next, lightly pull your shoulder blades down and back (try not to shrug). With the elbows bent and palms up, rotate your hands outward. You should feel the muscles around your shoulder blades working if you are performing this correctly. Hold for 2 seconds and perform 10 repetitions.


In the office we tell patients the best posture is the next one. In other words, keep moving! That being said, we realize there are days and time where you must sit for long periods. Try the exercises above and check out our YouTube video for more exercises and stretches to help improve your posture!

Snow Shoveling Pain: A Guide to Injury Prevention & Recovery
Shoveling can be a great form of exercise but comes with a high risk of injury. Our chiropractors break down the movement of shoveling and how to reduce your risk of injury.
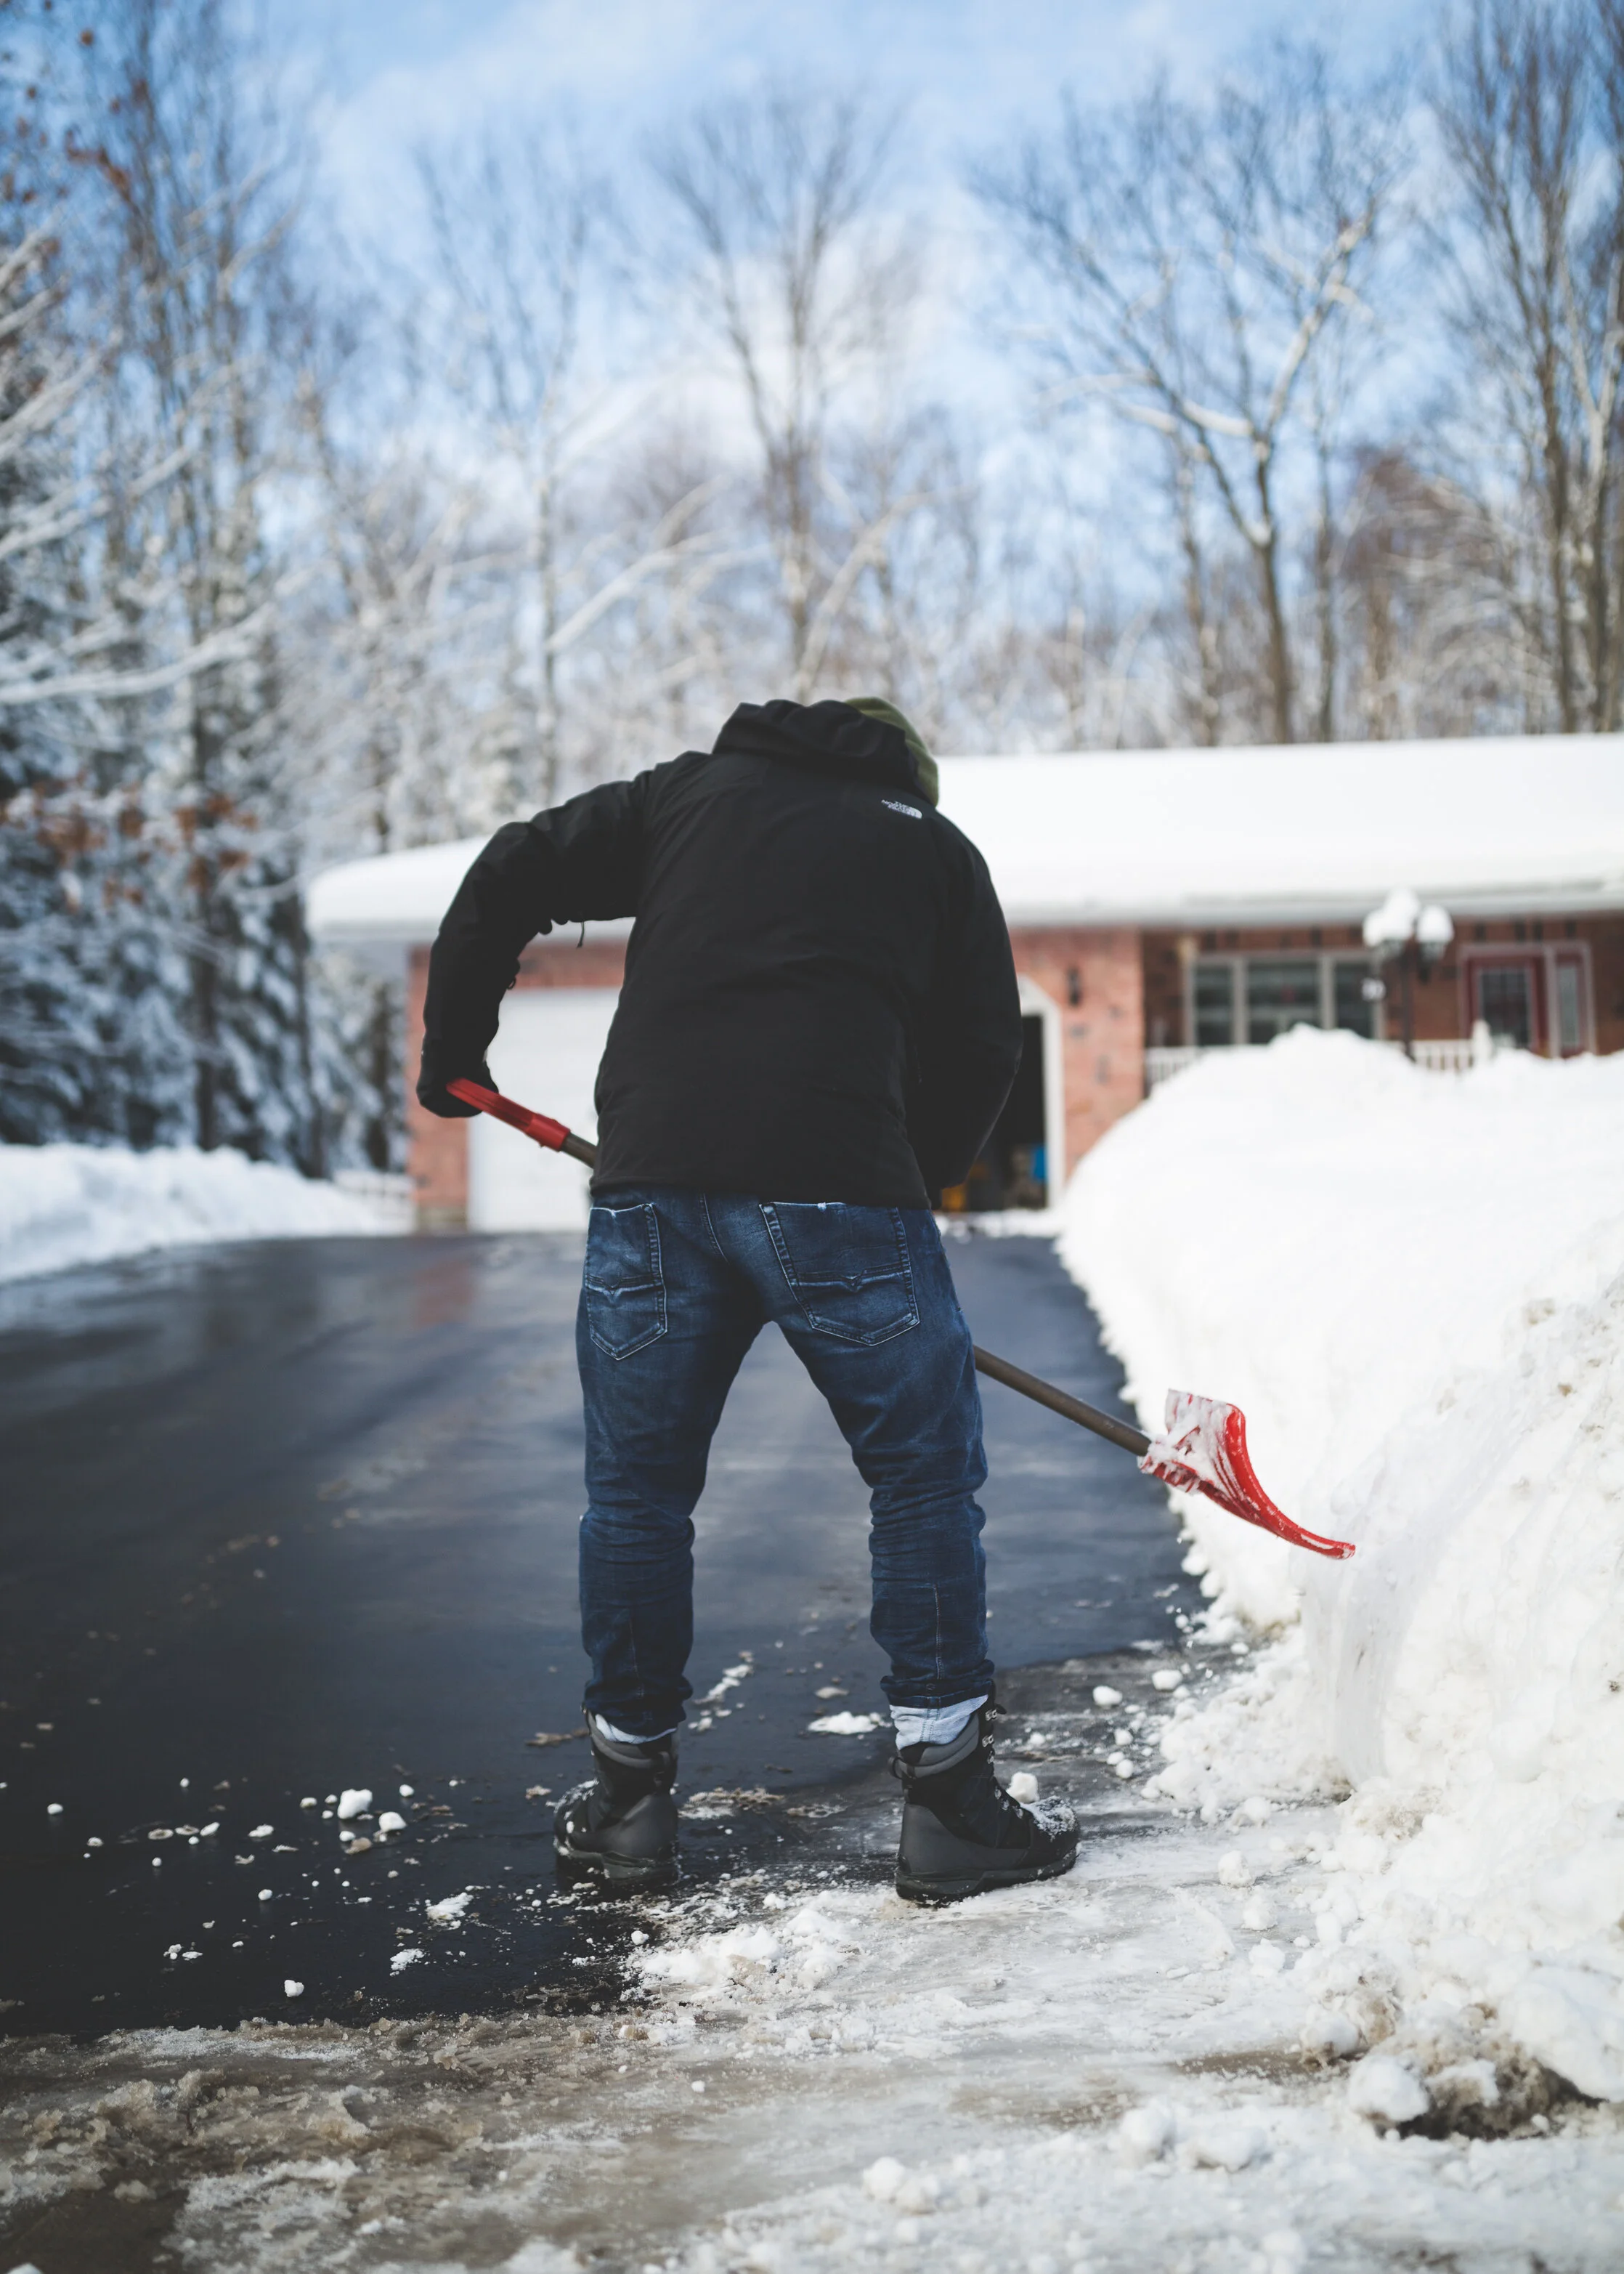
Did you know that about 56% of snow related trips to an emergency room are sprains and strains? Since we are experts in sprain/strain injuries, we thought we would give you a couple exercises to help with the soreness and pain from shoveling.
Before we get into the stretches, let’s first examine the complex movement of shoveling. Shoveling is a combination of squatting, lunging, bending, lifting, pulling and twisting all packed together. When performed with proper body awareness, shoveling can be a great workout. However, shoveling is typically performed more as a chore over a long duration with little breaks. As you get tired, your movement patterns begin to break down and you become more susceptible to injury. Movements like bending at the spine, twisting too quickly and holding the shovel too far away from the body can often lead to muscle strains.
Hip Flexor Stretch
Our first exercise is a hip flexor stretch. To perform start in a half kneeling position as pictured below. Squeeze your glutes and shift forward slightly without extending at your low back. You should feel a stretch in the front of the hip and thigh. You can increase this stretch by reaching the arm of the knee that is on the ground overhead. Hold for 10-20 seconds and perform 3 repetitions on each side.


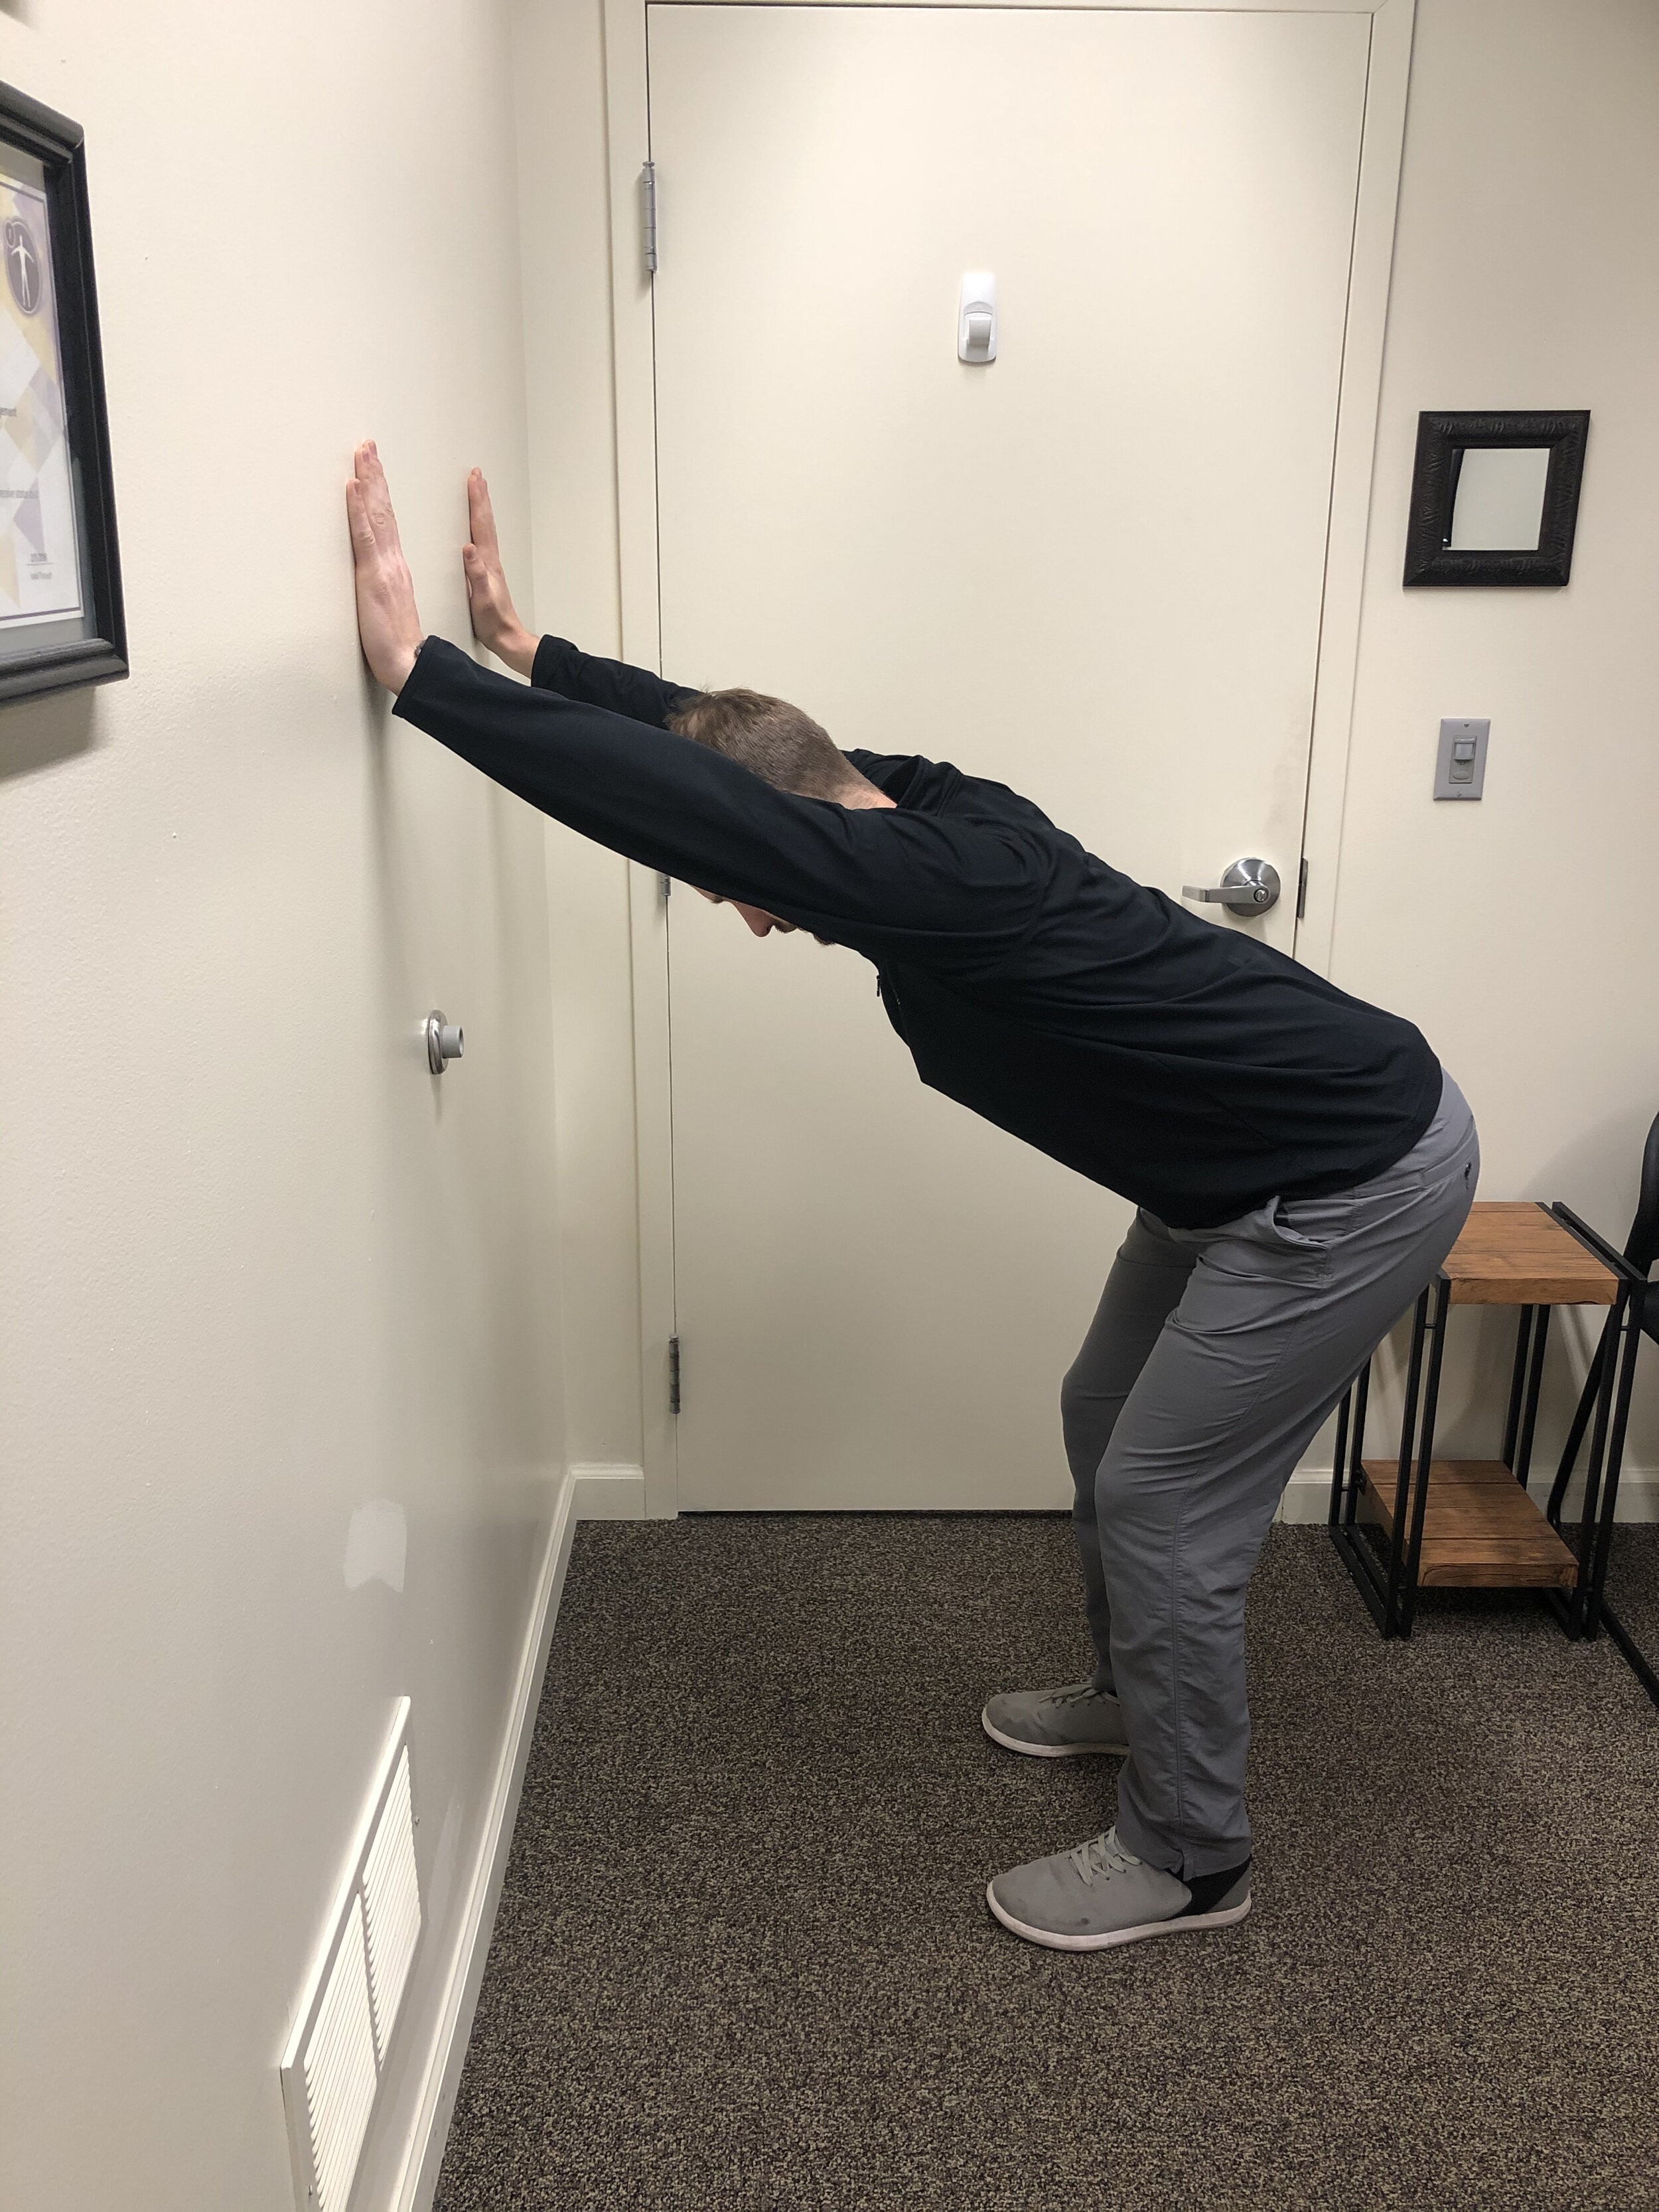
Standing Extension Stretch
Our second exercise is a standing extension stretch. First, stand near a wall with the elbows bent to 90 degrees. Move toward the wall until the finger tips touch the wall. Place hands shoulder height like you would perform a pushup. Slowly extend your spine and head in a gentle wave like motion. Take this movement slowly and try to increase range of motion as you go. Perform 2 sets of 10 repetitions


Upper Extremity Stretch
Our last exercise is a biceps and forearm stretch at the wall. To start, place your palm on the wall with the thumb up with a slight bend at the elbow. Slowly attempt to straighten the elbow and turn your body away from the wall. This can sometimes be an intense stretch so perform as tolerated. Try holding for 10-30 seconds 3 times on each arm.


We hope you find these exercises helpful during the upcoming winter! Please remember these exercises should not be used to treat or evaluate any injuries. They should also not cause you any increase in symptoms. If you have any questions, please contact our office. And for more information, check out our video.

How to Instantly Improve Your Squat
Saratoga Springs Chiropractors, Dr. Favro and Dr. Campbell break down the squat pattern to help you improve athletic performance and reduce injury.
The squat…
Love it or hate it you are going to have to do it on a daily basis. Whether it’s part of your workout routine, getting into your car or sitting up from the dinner table the squat is truly a functional movement.
What if the way you were squatting on a daily basis was contributing to nagging low back, hip or even knee pain? Most patients enter our office with the goal of getting out of pain. But when there is no clear mechanism of injury to cause their symptoms, we have to start looking at the way they move to perform everyday tasks. This is why an exam that includes assessing functional movement is so important. If we can identify limitations that are contributing to altered movement patterns, we can then design a program to enhance the way someone moves thus reducing pain.
When you perform movement evaluations as often as our doctors do you start to notice common patterns. Based on the most common faults or limitations we see with the squat pattern we wanted to share our top 3 exercises to help our readers feel better and move better!
Ankle Mobility
Our first exercise is to improve the range of motion at the ankle, specifically dorsiflexion. This exercise is great because all you really need is a wall. Place the foot about 4-5 inches away from the wall, keep the foot flat and try and bring the knee toward the wall. You shouldn’t experience any pain in the front part of the ankle. Hold for 1-2 seconds and perform 10 repetitions.


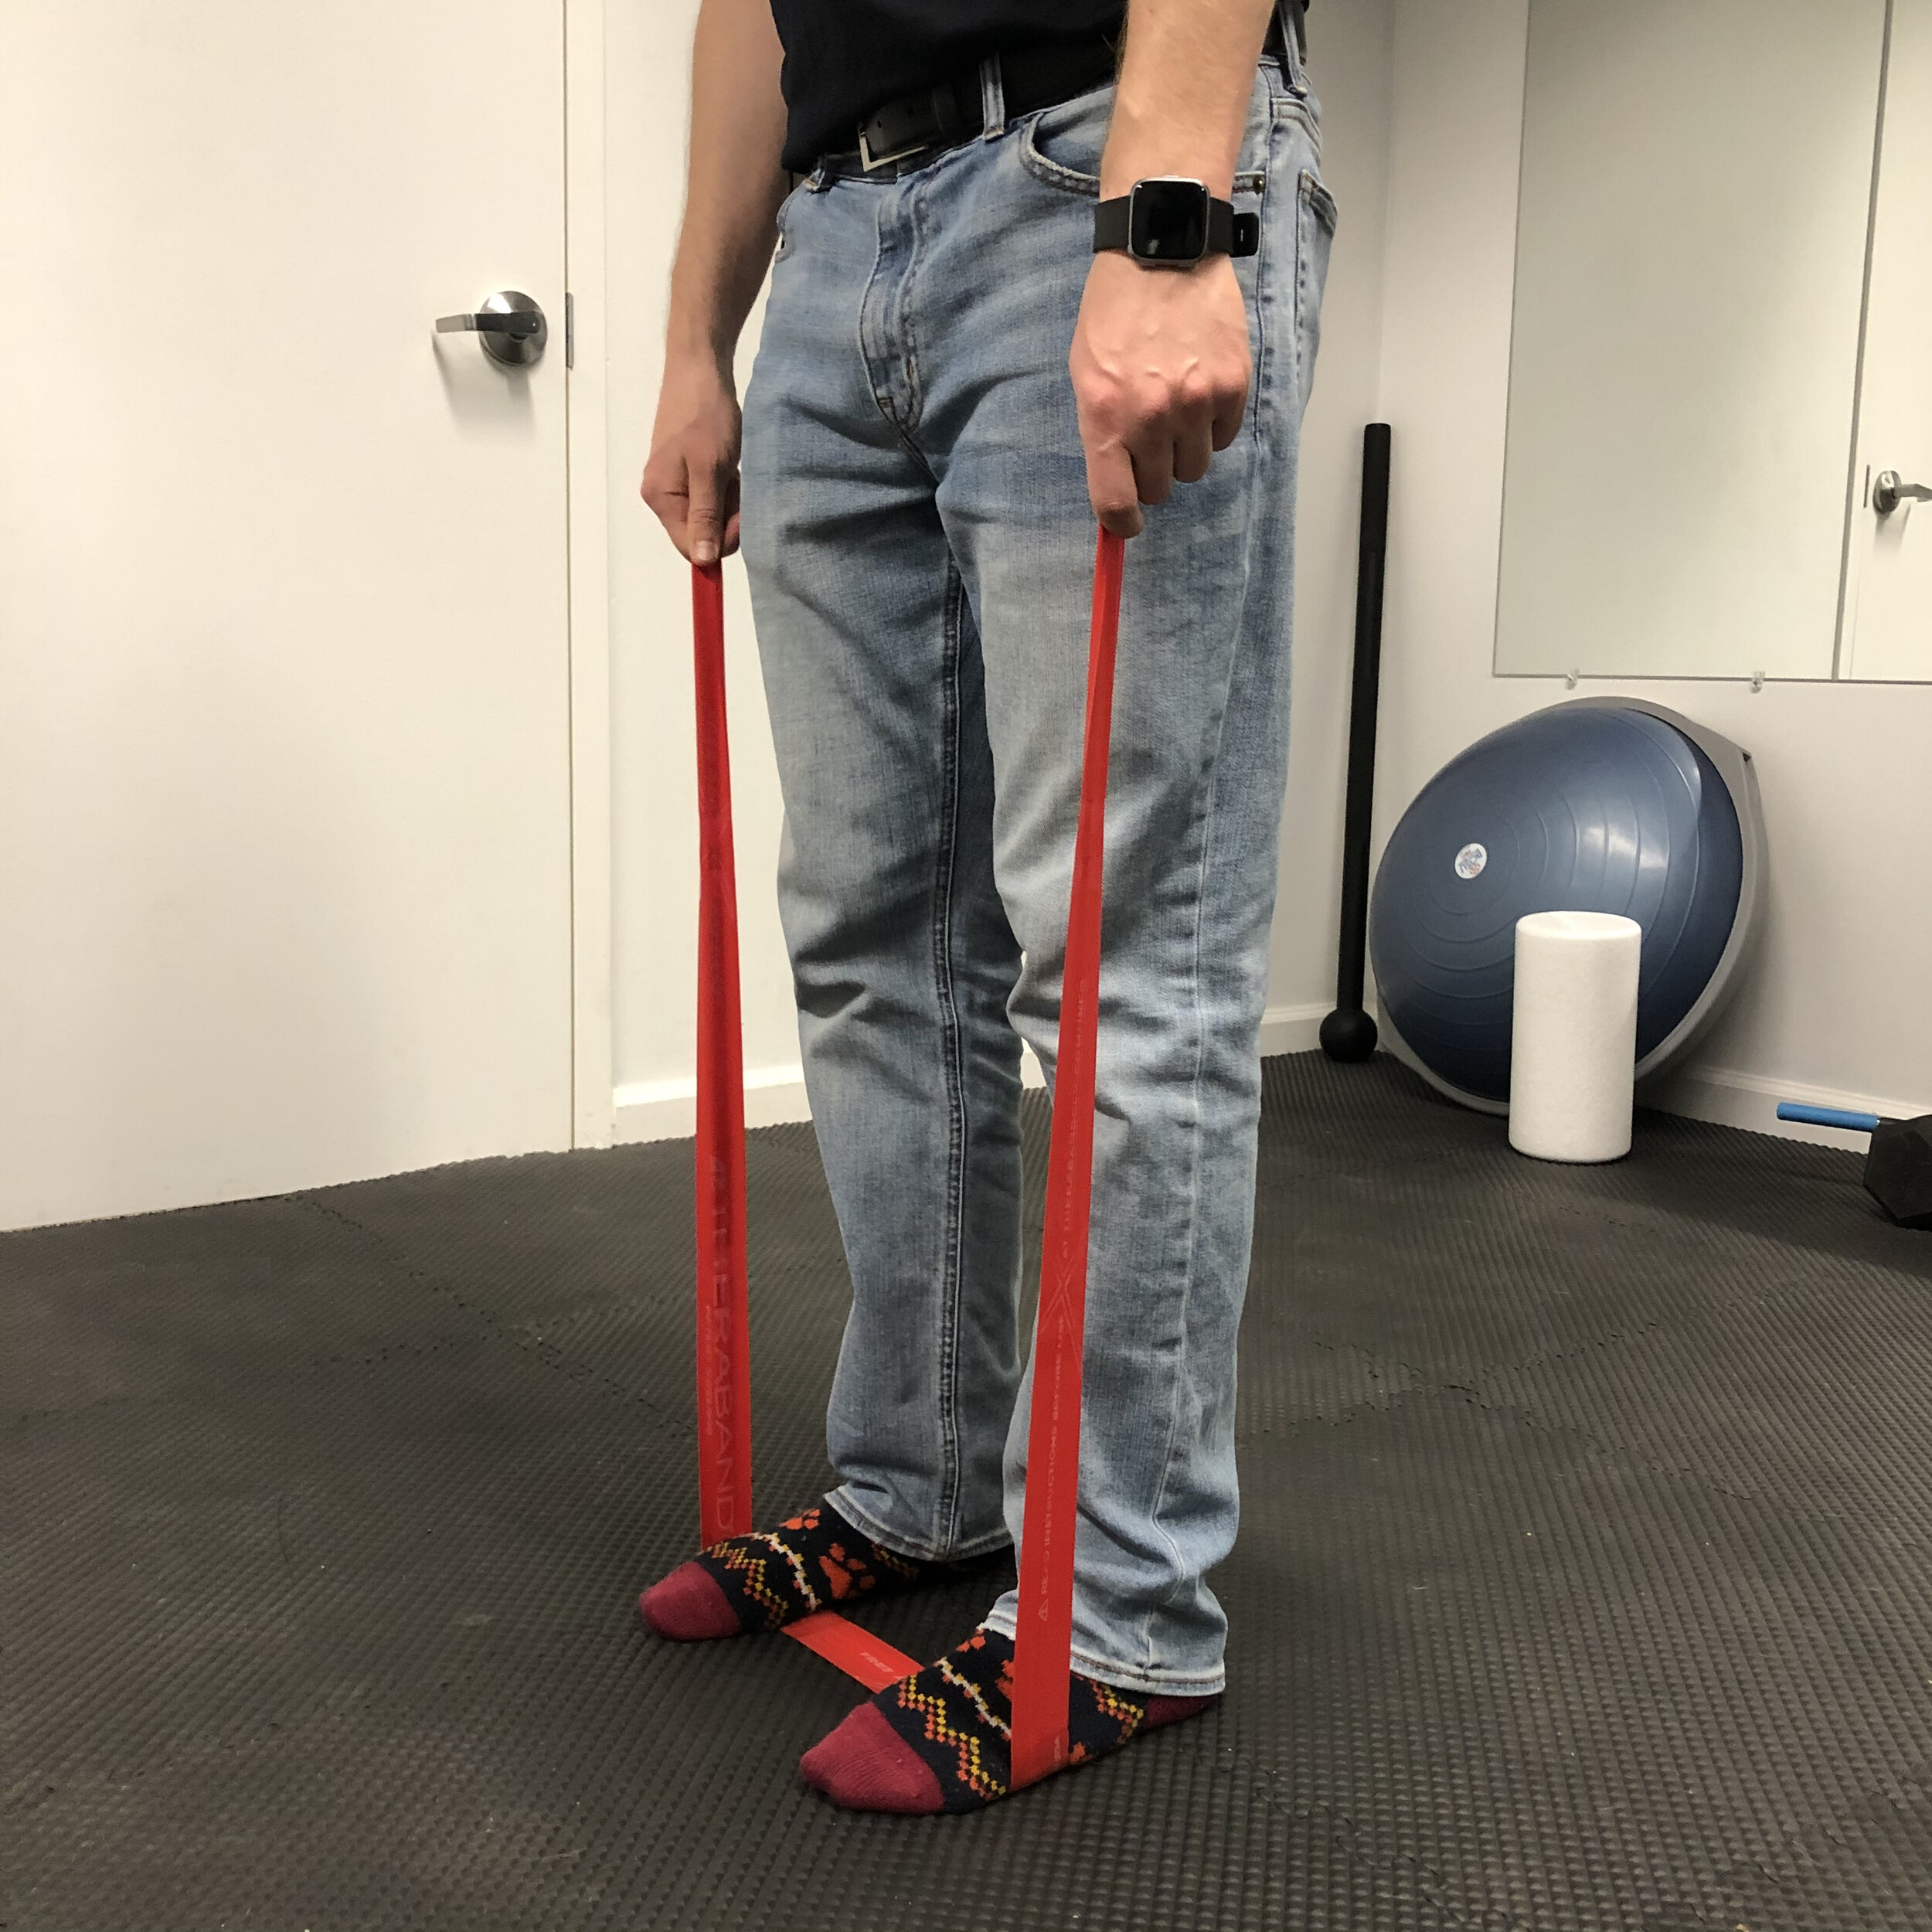
2. Hip Control
Our second exercise is to improve the ability of our hips to control our pelvis. A common fault in the squat is when the knees start to cave in. This can be problematic because it can not only irritate the hips and knees but it can also be a predictor of knee injuries in the future. To perform, grab a band and wrap it around the legs as shown below. Once the band is situated step side to side with the toes forward. Make sure you control the band. Try 2 sets of 10 in each direction.


3. Leg Torque
Our third exercise is all about creating tension at our feet and hips to allow our joints line up appropriately. Imagine digging your feet into the sand without actually rotating the feet out. Creating this torque, you should feel the arch at the bottom of the foot start to engage, the knees rotate out and the muscles in the hip working. Try and hold for 2-5 seconds and repeat 10 times.


For more information, including videos on how to perform the exercises mentioned above, head over to our YouTube video by clicking the hyperlink.

How to Win at the Races
Heading to the Saratoga Race Course this summer? Winning isn’t always about making money. Check out our chiropractic blog from Dr. Patrick Campbell, chiropractor on how to get the most out of your day at The Spa!

Hello Saratoga!
It’s that time of year, track season is right around the corner. Even though I am new to Saratoga, I’m quite familiar with the buzz and electricity that comes with opening day. I spent summers visiting Saratoga and grew up a mile from Belmont Racetrack. With this being the longest meet yet, there will be plenty of opportunities to enjoy a day at the races and we wanted to share some useful tips to help you win the day!
Hydration
Make sure you are staying hydrated by drinking the recommended amount of water. Typical recommendations are usually the 8 by 8 rule, 8 glasses of 8 fluid ounces. While this is a great starting point, if we wanted to get a bit more specific we would actually look to drink half our body weight in fluid ounces. This means if you weigh 100 lbs, your recommended intake would be 50 fluid ounces. Our bodies our 70% water, so make sure you are setting yourself up to succeed with proper hydration intake. We are lucky to live in a city where we can take a quick trip to the state park and fill up a couple jugs of natural spring water, so there should be no excuses here.
Footwear
Choose your footwear wisely. Proper fitting shoes on a race horse can make or break their chances at beating the odds and our selection is no different for avoiding dreaded heel pain after a day on your feet. While it might not make sense from a fashion standpoint, trying to avoid footwear with an elevated heel is recommended. Having your heel propped up not only makes your leg do more work to balance it also increases tension in the calf. Another recommendation would be wearing footwear with a wide toe box. Our toes are designed to be able to grip the ground. Narrow toe boxes in shoes also make the foot and leg work harder because the base becomes smaller. They can also be a reason for bunion formation from long term use.
Your Seat

Just like your footwear matters, so does what you sit on. If you are lucky enough to snag a picnic table, try bringing a padded cushion to sit on to avoid hip and low back pain. If you are bringing your own chair, be aware that most camping or lawn chairs have a bottom that forces your tailbone to rotate under our hips which can place a good amount of pressure on our low back, specifically the discs. If you aren’t in the market to buy or replace your current chair try placing a towel roll vertically along your spine against the back of the chair. This accompanied by placing your weight in your SIT bones will help take pressure off the low back. Periodic breaks from sitting are also helpful. As we like to say, “The best posture is the next one.”
Wagering
This last tip only applies if you are making any wagers during your day at the track. If you are, have some fun and a pick a long shot. My favorite is a $2 bet to win, place and show which comes out to $6 total. I was lucky enough to have this pan out on 8/23/08 at Saratoga Racetrack. Below is a video of the race that put a little extra cash in my pocket. Maybe some of you Saratoga faithful remember the day Slambino hit at 88-1.
If you have any questions about the content about, or would like to schedule an appointment, give us a call at (518) 584-9500. I hope you have a happy and healthy summer.

Tips for Running in the Winter
Running in Saratoga Springs can be great in the summer but challenging in the winter. This article has some tips on staying safe if you chose to venture outside to get your miles in. Our Saratoga Springs chiropractic office has helped many runners stay fit and healthy through the winter months while still training outside.
Tips for Running in the Winter
Running is one of the most popular sports in the country. It requires little gear, no membership, and you can run anywhere. As long as you have a pair of shoes and some time, you can run. That is, unless you live in the Northeast. Running in the summer around Saratoga Springs is amazing. One can get lost running by old victorians, through the Saratoga Spa State Park or through the Saratoga Battlefield. The winter months can make you think twice about your choice of exercise. If you’re determined to continue training, here are a few tips.
Be Seen
If you are like most people, your running times are either early in the morning or after work which means you’ll likely be running in the dark. We suggest you wear reflective gear on the middle of your body, and somewhere on your arms or legs. If you want to go the extra mile (no pun intended), wear a headlamp as well. Snowbanks may also prevent drivers from seeing you so be alert when you are crossing streets or going into traffic.
Proper Shoes
Most running shoes are designed with mesh to keep your feet cool. In the winter, you want shoes that have the least amount of mesh. This will not only keep your feet warm, but keep out the snow and water. Of course, you also want a good pair of socks to go with those shoes and we recommend non-itchy wool socks.
Dress Appropriately
Dressing in layers is key. The air trapped between the layers is warmed by your body and acts as insulation. The biggest thing is to dress as if it were about 20 degrees warmer. You don’t want to sweat too much when you are running in the cold. That could lead to chills when you are done.
Warm up
Warming up before you head outside will make those first few minutes less stressful on your body. In other words, the cold won’t feel as cold. Especially since you were just told to dress as if it were warmer. Doing body-weight squats or lunges are a good way to get the blood flowing through your legs.
Slow down
Running outside means facing obstacles you may not know are there. Slipping is a serious danger for anyone who ventures outside in the winter months. Make sure you slow down your pace, take shorter strides, and strike the ground with a flat foot. This will help minimize the risk of slipping.
Post run recovery
After you are finished your run it is important to get out of your sweaty or wet clothes and put some dry warm clothes on. After exercise, your core temperature drops and puts you at risk for getting chills. Once you are in dry clothes, it is a good idea to drink warm fluids or have some soup. This will help you hydrate and warm your body.
Treadmill Running

If you are not interested in running in the cold or if conditions are too dangerous, the treadmill is a good alternative. To get the most out of the treadmill, put it at a 1% incline. If the treadmill has built-in fans, turn them on high as well. The incline activates the muscles required to propel you forward while the fans activate the sensory cells on your skin and remind your brain of running outside.
Whether you run in the cold, snowy weather or inside on the treadmill, it is important to stay hydrated, stretch, and take care of injuries as soon as they start. At our Saratoga Springs chiropractic office, we offer free injury screens and would be happy to answer your questions about running.
For the best running gear and expert fittings, check out our friends at iRun Local or Fleet Feet Sports!

How to use a Standing Desk
Standing desks can be a lifesaver but if you don’t know how to properly use it, you could be doing more harm than good. Saratoga Springs chiropractor, Dr. Adam Favro, addresses some key point to getting the most out of your new desk.
How to use a Standing Desk
Your new standing desk arrive and you are ready to take on the week. But what are you supposed to do with this new desk? At our Saratoga Springs chiropractic office, we are asked at least twice a week about standing desks. Are they good for you? Do they really make a difference? How do I set mine up?
According to a 2014 Gallop pole, the average American is working 49 hours a week, or 9.9 hours a day. Working is the ultimate endurance sport and, like any sport, if you don’t have the proper equipment you can struggle. Furthermore, if you don’t know how to use that equipment, you may be doing more harm than good. Here are a few tips on how to get the most out of your standing desk.
The Set Up
Setting up your desk can be a challenge but there are some simple things to keep in mind. First, your monitor should be between 18-28” from your eyes with the top 1/3 of the monitor level with your eyes. Your elbows should be at a 90-degree angle with your forearms resting comfortably on the desk top. The keyboard and mouse should be at a comfortable position as to not strain your wrists.
Posture
As a chiropractor, posture is the thing that hits home. Similar rules apply to standing as to sitting. We tell patients to “preserve the curve”. The spinal column is shaped like an “S”. This feature allows great movement and is important in our daily function. When fatigue sets in, the head and shoulders come forward, and the curve in the middle back (kyphosis) increases and lower back decreases. This prevents your lungs from being filled fully and decreases oxygen to the brain.
Alternate Your Position
The most problematic aspect of your 9.9 hour work day is long periods of not moving. Standing or sitting in one position causes blood to pool and muscles to get tight and weak leading to poor posture among other things. The key to success is alternating between sitting and standing. If you choose to stand, switch your foot position. Try a wider stance with your feet just wider than your shoulders. Stand with weight mostly on one leg then switch to the other or in a split stance with one leg forward and one back. We also encourage patients to get a small box they can rest their foot on.
Get an Anti-Fatigue Mat or Balance Board
Anti-fatigue mats are those memory-foam-like mats that are supposed to keep you from getting tired. The truth is, when you’re tired, your tired. The real benefit of these mats is they keep you on an unstable surface so you have to continue moving. Muscles then contract which helps blood flow. If you are looking to add a little fun in your workday, check out these balance boards. They will work on balance, posture and keep you moving.

Take Breaks
Perhaps the most important thing is to take a break. The best thing you can do for your physical and mental health is to take small, frequent breaks. Our bodies thrive on movement and stimulation. By giving yourself what you need, you will find your days more productive and enjoyable.
A standing desk can be a life changing piece of equipment, but it will not be a magic solution. There is still effort that goes into setting up the desk and knowing how to properly use. For more information on how to set up your desk or to see if you could benefit from one, give our Saratoga Springs chiropractic office a call at (518) 584-9500.